Connect an AWS account
Connecting an AWS account lets Retrievy's CSPM scanner run against your cloud. Findings land in the Command Center and feed into your Retrievy Index within minutes of the first scan completing.
This page walks the full flow: create a read-only IAM user on the AWS side, generate access keys, then add the account in Retrievy.
Before you start
You need:
- An AWS account with permission to create IAM users.
- A Retrievy workspace with CSPM enabled.
- The manage-cloud-accounts permission in Retrievy.
- One free data-source slot on your plan. Essentials starts at 2 slots. If you've used them up, the wizard shows Slot Limit Reached at the start of step 2 with a link to upgrade. See plan feature matrix for slot counts per plan.
Retrievy uses long-lived access keys today. A cross-account role-assumption flow is on the roadmap.
Step 1. Create a read-only IAM user on AWS
In the AWS console:
-
Open IAM → Users → Create user.
-
Name the user
retrievy-cspm-reader(or anything you like). Do not enable AWS Management Console access. -
On the Set permissions step, choose Attach policies directly and attach both AWS-managed policies:
- SecurityAudit (
arn:aws:iam::aws:policy/SecurityAudit) - ViewOnlyAccess (
arn:aws:iam::aws:policy/job-function/ViewOnlyAccess)
Together these grant Retrievy's scanner the read-only API access it needs to enumerate misconfigurations across S3, IAM, EC2, RDS, CloudTrail, GuardDuty, and the other services Retrievy audits. No write permissions, no admin permissions.
- SecurityAudit (
-
Finish creating the user.
If your security policy requires a tighter custom permission set, contact Retrievy support for the verified minimum permissions list.
Step 2. Generate access keys
Still in IAM:
- Open the user you just created.
- Go to Security credentials → Access keys → Create access key.
- Choose the use case Application running outside AWS, acknowledge the recommendation banner, and continue.
- Copy the Access key ID and the Secret access key. The secret is shown only once. Store it somewhere you can paste from in the next step.
The access key is a long-lived credential with read access to your entire AWS account. Treat it like a password. Rotate it regularly, and revoke it from the AWS console the moment you remove the account from Retrievy.
Step 3. Add the account in Retrievy
In Retrievy:
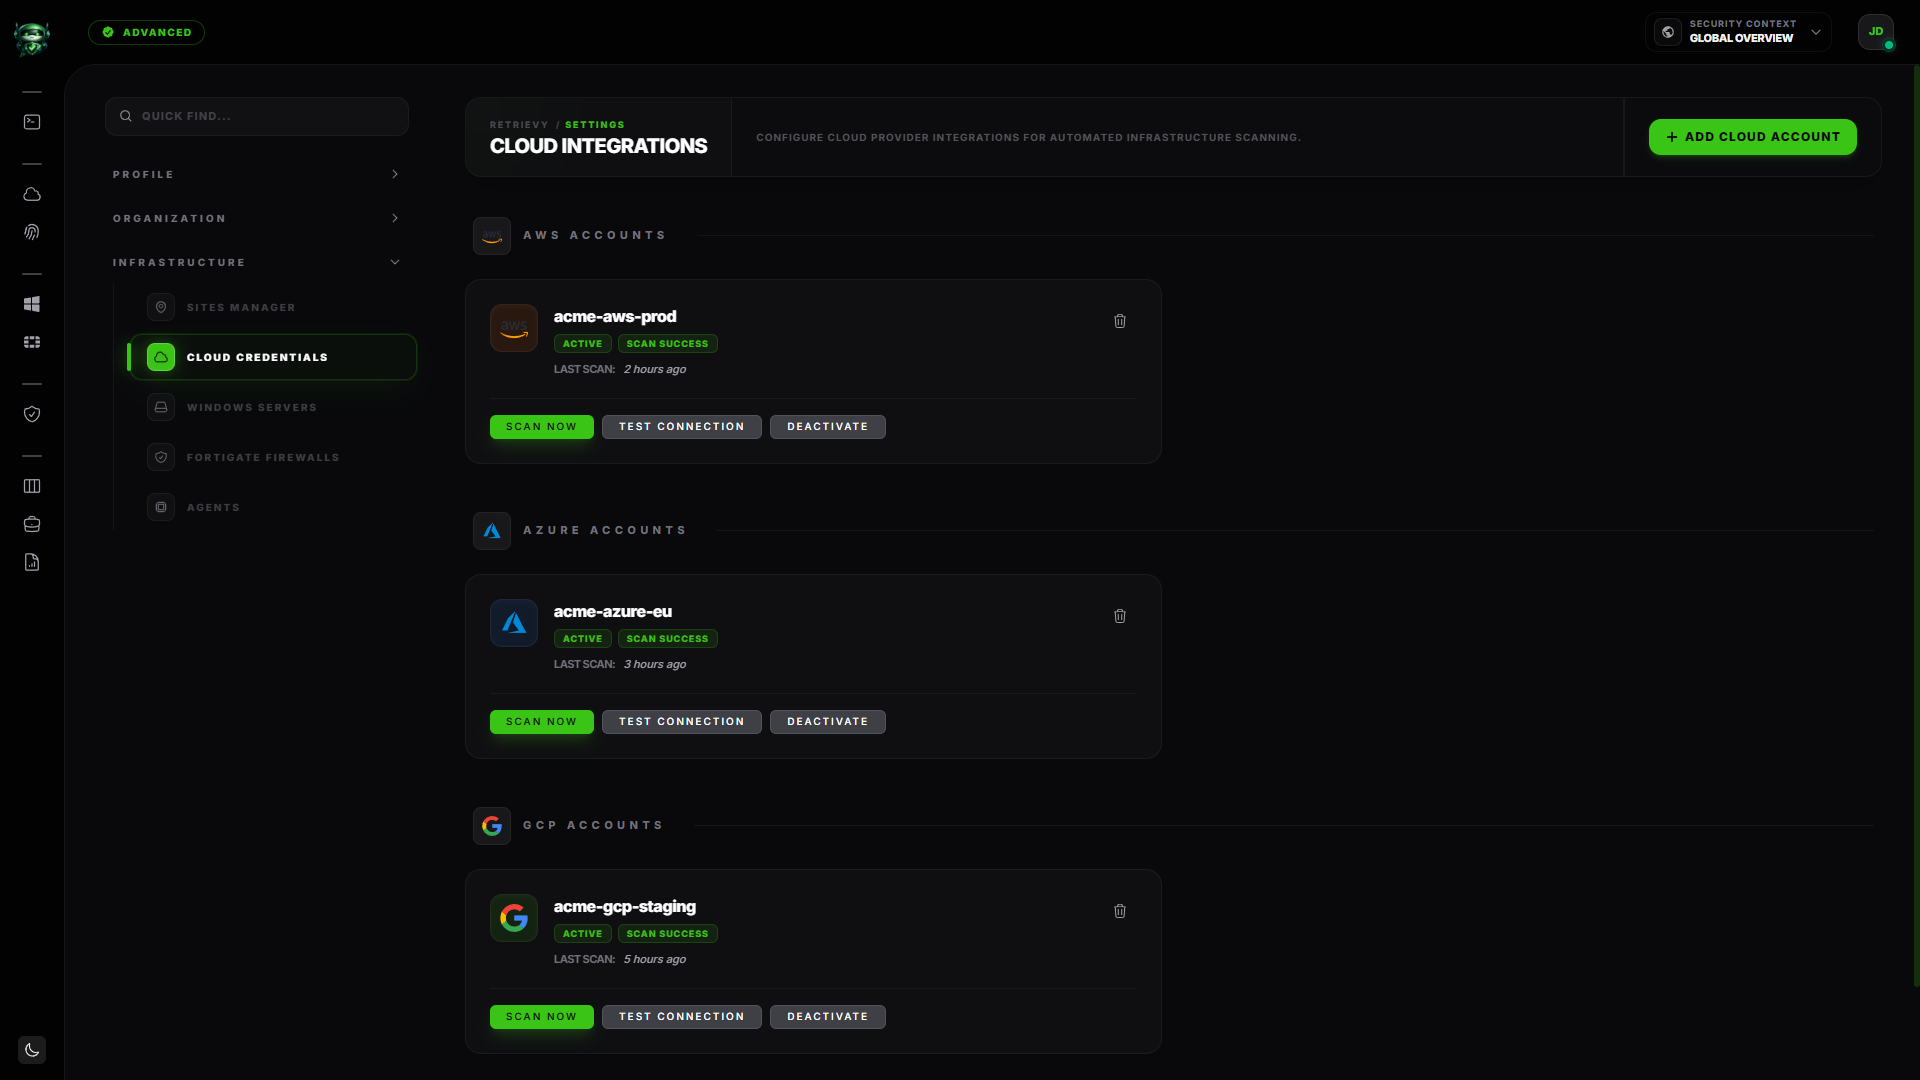
- Open Settings → Cloud Integrations. The page title reads Cloud Integrations.
- Click Add Cloud Account in the top-right.
- The wizard opens with three steps shown in the header progress bar: IDENTIFY TARGET, INGEST CREDENTIALS, and SYNC PROTOCOL.
Step 3.1 — IDENTIFY TARGET
Pick the provider. Select AWS from the provider tiles and click Next.
Step 3.2 — INGEST CREDENTIALS
Fill the three fields:
| Field | What to paste |
|---|---|
| Access Key ID | The access key ID you copied in step 2. |
| Secret Access Key | The matching secret. The field is masked. |
| Region | The default AWS region for the initial scan. us-east-1 is the default. Pick whichever is closest to your environment. |
Give the account a friendly name when prompted (this is what shows up in the account list later, for example prod-aws-eu).
Click Next.
Step 3.3 — SYNC PROTOCOL
Retrievy records the credentials and shows a connection-test result. Today the test is a quick sanity check at this step. The full authentication test happens on the first scan, which kicks off automatically as soon as you finish the wizard.
When the account is saved, you see the toast Cloud account added successfully! and the wizard closes.
Step 4. First scan
Right after the wizard closes, Retrievy queues your first scan. You can watch it in two places:
- On the Cloud Integrations page, the new account card shows a Scanning... state.
- On the Command Center, the Recent Scans list shows the in-progress run.
A first scan typically takes a few minutes for a small account and longer for a large one. When it completes, findings start landing in your Hardening Kanban and your Retrievy Index updates within seconds.
What you see in the account list
After your first account is connected, the Cloud Integrations page shows it as a card with:
- The friendly account name at the top.
- A status badge: Active (green) or Inactive (gray).
- Below the badge, a scan state pill: Scanning..., Scan Success, or Scan Failed.
- A
Last scan: [time] agotimestamp (or No scan history before the first run). - Three actions:
- Scan Now kicks off a scan on demand without waiting for the daily schedule.
- Test Connection runs a quick credential check.
- Deactivate (or Activate if currently deactivated) pauses scans without removing the credentials.
If you have no accounts connected at all, the page shows the empty-state heading Core Intelligence Offline with a button to add your first account.
When you hit the plan quota
If you try to add more accounts than your plan allows, step 2 of the wizard is replaced by the Slot Limit Reached panel with an upgrade CTA. You won't be able to finish the wizard until you either upgrade your plan or deactivate an existing account to free a slot.
The slot count refreshes on your billing cycle. See the plan feature matrix for what's included on each plan.
What Retrievy scans
The CSPM module runs a comprehensive audit against your account that covers the standard service-by-service audit set: IAM (users, roles, password policy, MFA), S3 (encryption, public access, logging), EC2 (security groups, EBS encryption, IMDSv2), RDS (encryption at rest, public access), CloudTrail (multi-region, log file validation, KMS encryption), GuardDuty, Config, KMS, Lambda, ELB, and more.
Every finding lands with its compliance mappings already attached (CIS AWS, NIST CSF, NIST 800-53, ISO 27001, SOC 2, PCI DSS 4.0, HIPAA, MITRE ATT&CK, and more), so you can switch between the Kanban view and the Compliance Hub view of the same data.
Rotating or revoking credentials
To rotate:
- In AWS IAM, create a new access key for the same user.
- In Retrievy, click Test Connection on the account card. If it still passes with the old key, paste the new key over the old one in the account settings (re-run the wizard for the same provider; the existing account is updated in place).
- Once Retrievy confirms it's using the new key, deactivate the old key in AWS IAM.
To revoke entirely:
- Click Deactivate in Retrievy. Scans pause but the account record remains.
- In AWS IAM, delete the access key, or delete the IAM user.
- Optionally remove the account from Retrievy entirely from its detail view.
Troubleshooting
Symptom: The wizard saves the account but the first scan fails immediately with a credential error. → Fix: Re-check the access key and secret in AWS IAM. Make sure the key is Active, not deactivated. Make sure you pasted the secret correctly (no leading or trailing whitespace).
Symptom: First scan completes but every finding for a service is missing or shows AccessDenied. → Fix: The IAM user is missing one of the managed policies. Re-attach SecurityAudit and ViewOnlyAccess. If you used a custom permission set, contact Retrievy support for the verified minimum permissions list.
Symptom: The account stays in Scanning... for over an hour. → Fix: Very large accounts can take a while on the first run because the scanner walks every region. Wait it out, or click Scan Now to re-try a smaller scope. If it still doesn't finish, contact Retrievy support with the account ID.
Symptom: Toast says Cloud account added successfully! but the account never shows up in the list. → Fix: Reload the page. The cloud-accounts list updates live; if your network blocks WebSocket connections the list won't refresh until you reload.
Symptom: Slot Limit Reached appears even though I deactivated an account. → Fix: Deactivated accounts still consume a slot until removed entirely. Open the account detail and remove it (separate from deactivate), or upgrade your plan.