Microsoft Entra ID single sign-on
This guide walks you through connecting Microsoft Entra ID (formerly Azure AD) as the identity provider for your Retrievy workspace. Once it is in place, your team signs in with their corporate Microsoft accounts instead of email and password, and you get one place (Entra) to revoke access when someone leaves.
Single sign-on is available on the Advanced and Build Your Own plans. The Essentials plan does not include SSO. See the plan feature matrix for the full breakdown.
Why Microsoft SSO
Two reasons. First, you stop maintaining a parallel password list inside Retrievy. Every employee already has an Entra account, your IT team already runs MFA and conditional access policies there, and offboarding is already a single Entra disable. Reusing that machinery for Retrievy logins is faster than reinventing it. Second, when you turn on Enforce SSO Only (covered below), passwords are disabled for the workspace and the only way in is through your IdP. Stolen Retrievy credentials become a non-event.
Before you start
You need:
- An Entra ID directory where you hold the Global Administrator or Application Administrator role. Granting client-secret access and admin consent for sign-in requires one of those.
- The Retrievy workspace subdomain you log into (for example
acme-corp.retrievy.com). You need the exact host because the redirect URI is tenant-specific. - The Configure SSO providers and enforcement toggle granted to your Retrievy role, under Settings: SSO in the role builder. The default Tenant Admin role already has it.
- A Retrievy plan that includes SSO (Advanced or Build Your Own).
Allow about 15 minutes. Most of it is clicking through the Entra portal.
Step 1. Register the application in Entra
You are creating a confidential client in your directory that Retrievy will use to start the OIDC sign-in flow. The five sub-steps below match the order the Entra portal walks you through.
1a. Start a new app registration
- Sign in to the Entra admin center with an account that holds Global Administrator or Application Administrator.
- Open Microsoft Entra ID in the left rail, then App registrations under the Manage group.
- Click + New registration at the top of the list.
1b. Name the app and pick the audience
On the Register an application form:
- Name: something your IT team will recognise.
Retrievy SSOis fine. - Supported account types: pick Accounts in this organizational directory only. Single-tenant is the right choice for almost every customer. Only change this if you explicitly need to let guest users from other Entra tenants sign in.
- Redirect URI: leave both fields blank for now. You will fill the redirect URI in step 1c so you can paste the exact value Retrievy generates.
Click Register.
The portal drops you on the new app's Overview page. Do not close this tab. You will copy two values from it in step 1e.
1c. Configure the redirect URI
Retrievy needs to know where Entra should send the user after sign-in. The redirect URI is workspace-specific, so the value is generated for you inside the Retrievy wizard.
- In a new browser tab, open Retrievy and go to Settings then Single Sign-On.
- Click Setup SSO.
- On the wizard's first step (CORE SELECTION), pick Microsoft Entra ID and click Configure Integrations.
- On the AUTHENTICATION step, scroll to the Authorized Redirect URI panel on the right side of the form. The exact URL is shown in a copy-ready box. It looks like
https://acme-corp.retrievy.com/tenant-auth/microsoft/callback, with your own subdomain in front. Copy it.
Now switch back to the Entra tab:
- In the app's left rail, click Authentication under the Manage group.
- Click + Add a platform, then pick Web.
- Paste the redirect URI from Retrievy into the Redirect URIs field. Do not modify it. The path must match exactly, including the trailing
/callback. - Leave Front-channel logout URL blank and leave both Implicit grant checkboxes unticked. Retrievy uses the authorization code flow, which does not need either.
- Click Configure.
A trailing slash, a missing tenant-auth segment, or the wrong subdomain will cause Entra to refuse the sign-in with AADSTS50011: The reply URL specified in the request does not match. Copy the value from Retrievy; do not retype it.
1d. Grant Microsoft Graph permissions
Retrievy reads one piece of information from Entra after sign-in: the user's profile, so it knows who they are.
- In the app's left rail, click API permissions.
- The default User.Read delegated permission is already listed. That is the only permission Retrievy needs for SSO. Leave it.
- If your tenant requires explicit admin consent for the
User.Readscope, click Grant admin consent for [your directory name] and confirm. Most tenants do not need this forUser.Read, but if your Entra is locked down you will see a yellow banner asking for consent.
Do not add any other permissions. Retrievy's SSO path is sign-in only. Resource scanning (Azure subscriptions, Microsoft 365) uses a separate app and a separate consent flow described in Connect an Azure subscription.
1e. Generate a client secret
The client secret is the password Retrievy uses when it exchanges an authorization code for a sign-in token.
- In the app's left rail, click Certificates & secrets.
- Under the Client secrets tab, click + New client secret.
- Description:
Retrievy SSO. Expires: pick the longest window your security policy allows. 24 months is fine. Retrievy does not yet alert you before SSO secrets expire, so put a calendar reminder a week before the date. - Click Add.
- The portal now shows the secret. Two columns are displayed: Value and Secret ID. Copy the Value column. This is the only time it will ever be shown. If you navigate away before copying it, you have to delete the secret and create a new one.
The wizard field on the Retrievy side is labelled Client Secret Value, and only the value (a long opaque string) works. The Secret ID is an internal identifier and Retrievy will reject it.
1f. Note the tenant and client IDs
While you have the app open, go back to the Overview tab in the left rail. The header lists two UUIDs side by side:
- Application (client) ID: identifies the app you just registered.
- Directory (tenant) ID: identifies your Entra directory.
Copy both. You paste them into the Retrievy wizard in step 2.
Step 2. Paste the credentials into Retrievy
You should still have the Retrievy wizard open on the AUTHENTICATION step from earlier. If not: Settings then Single Sign-On, click Setup SSO, pick Microsoft Entra ID, click Configure Integrations.
Fill the three fields on the left side of the wizard:
| Field | Value |
|---|---|
| Directory (Tenant) ID | The Directory (tenant) ID UUID from Entra. Format: 00000000-0000-0000-0000-000000000000. If you leave it blank, Retrievy defaults to common, which lets users from any Entra tenant sign in. Leave it blank only if you intentionally want multi-tenant. |
| Application (Client) ID | The Application (client) ID UUID from Entra. |
| Client Secret Value | The secret you copied in step 1e. The field masks the value; click the eye icon to verify what you pasted. |
Below the credential fields, set the Default User Role. This is the Retrievy role assigned to any new user who signs in through SSO for the first time. Pick from the dropdown. If you select No Default Role, the user is created with no role and an existing Tenant Admin has to assign them one before they can see any module.
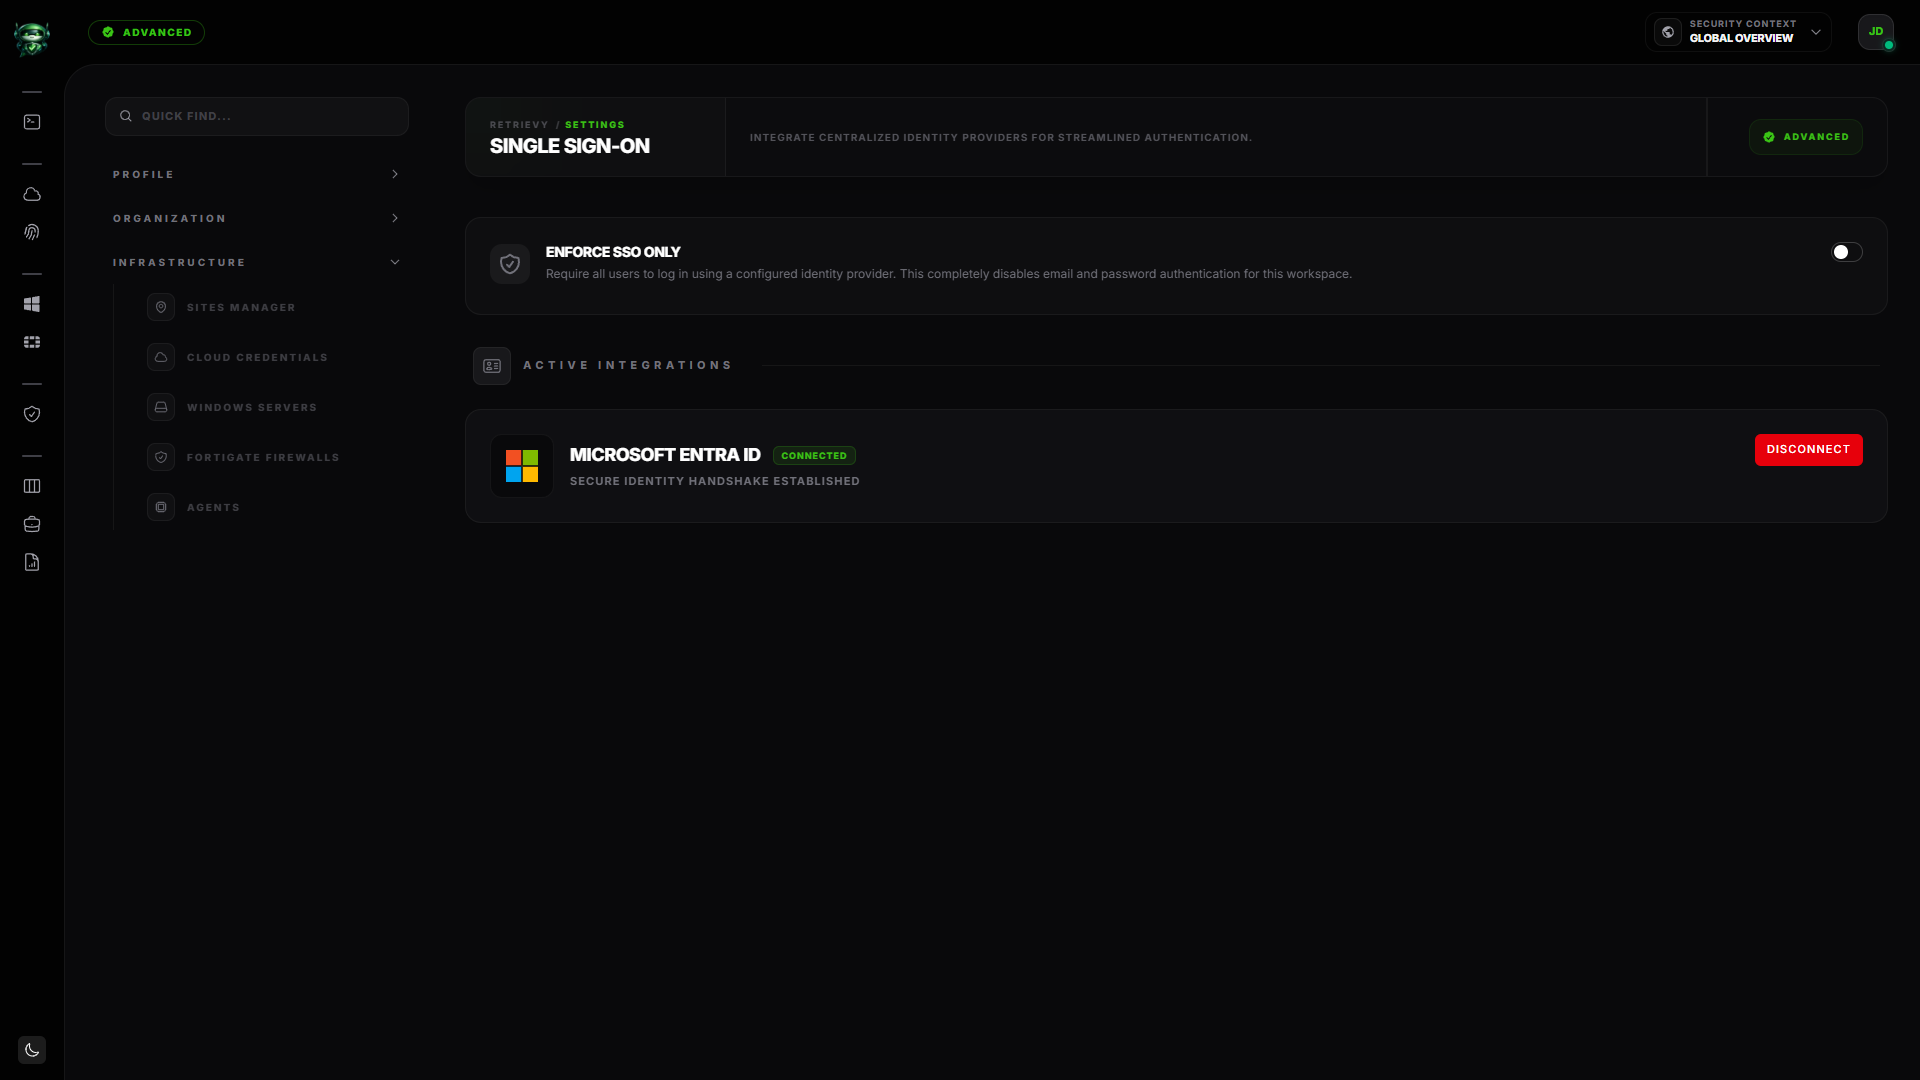
Click Authorize Vault at the bottom of the wizard. The wizard saves the settings, closes, and the Single Sign-On page now shows a card titled Microsoft Entra ID with a green Connected badge.
Step 3. Verify the sign-in flow
You verify with a fresh browser session so you are not riding on an existing Retrievy cookie.
- Open a private window (Incognito, InPrivate, etc.) and go to
https://[your-subdomain].retrievy.com/login. - Click Sign in with Microsoft. The login page now shows that button because SSO is configured.
- Entra prompts you to sign in (and run MFA if your conditional access policies require it). Use an Entra account that already exists in your Retrievy workspace, or any Entra account if you have set a Default User Role and want to test just-in-time provisioning.
- After consent, Entra redirects back to
https://[your-subdomain].retrievy.com/tenant-auth/microsoft/callback, which lands you on the Retrievy dashboard.
Check the user list at Settings then Team Members. The signed-in user appears with the role you set as the default (or their existing role if the account was already there).
Step 4. Optional: enforce SSO
Until you flip this switch, users can still sign in with their original Retrievy email and password. SSO is an additional option, not the only option.
To make SSO mandatory for everyone:
- On the Single Sign-On page, find the Enforce SSO Only card at the top.
- Toggle the switch on. Retrievy shows the success message SSO is now enforced. Passwords disabled.
Once enforced, the email and password fields disappear from the login page for your workspace. Only the Sign in with Microsoft button is shown. Any user without a linked Microsoft account is locked out.
Before you enforce SSO, make sure at least one Tenant Admin has signed in once via Microsoft, so their account is linked. If every admin loses access at the same time, recovery requires support intervention. Test the SSO flow end-to-end with at least one admin account before flipping the switch.
You can turn enforcement off later from the same toggle. Disconnecting the Microsoft provider entirely is done with the Disconnect button on the provider card; that action also clears the enforcement flag automatically.
Troubleshooting
Symptom: Sign-in fails with AADSTS50011: The reply URL specified in the request does not match the reply URLs configured for the application.
Fix: The redirect URI in the Entra app does not match the one Retrievy generates. Open the Entra app, Authentication, and confirm the Web platform has exactly the URL the Retrievy wizard shows in the Authorized Redirect URI panel. Watch for trailing slashes, typos in the subdomain, and missing tenant-auth in the path.
Symptom: Sign-in fails with AADSTS7000215: Invalid client secret provided.
Fix: Either you pasted the Secret ID instead of the Value, the secret expired in Entra, or someone rotated it without updating Retrievy. Open Certificates & secrets in the Entra app and check the Expires column. Create a new client secret if needed, then in Retrievy click Disconnect on the Microsoft card and re-run the wizard with the new value.
Symptom: Sign-in fails with AADSTS65001: The user or administrator has not consented to use the application.
Fix: Your Entra tenant requires admin consent for the User.Read permission. In the Entra app, open API permissions and click Grant admin consent for [your directory]. A green check mark appears in the Status column for User.Read.
Symptom: Sign-in completes but Retrievy shows Please use your original login method. Fix: The user account already exists in Retrievy and is locked to a different sign-in method. Each user is bound to the first provider they ever signed in with (email-and-password, Google, or Microsoft). To migrate a user to Microsoft SSO, a Tenant Admin must delete the user from Team Members and re-invite them; their next sign-in via Microsoft will create a fresh, Microsoft-linked account.
Related
- Plan feature matrix for the plans that include SSO.
- Roles and permissions for the Configure SSO providers and enforcement toggle.
- Connect an Azure subscription for scanning Azure resources (separate app, separate consent).
- Connect Microsoft 365 for scanning M365 posture (separate app, separate consent).