SLA policy
The SLA Policy page is where you decide how long Retrievy gives each severity tier before it counts a finding as breached. The same page also controls the warning threshold (when a still-OK finding starts showing the amber Warning state) and exposes the one-click rewrite that applies a new policy to findings you opened under the old one.
Open Settings → Organization → SLA Policy. The page header reads SLA Policy with the subtitle Set remediation windows per severity, and a warning threshold for incoming breaches.
Before you start
- The Modify tenant name, timezone, and settings permission. Tenant-admins have it by default. Without it, the page is read-only and the Save SLA Policy button is hidden.
- A sense of what each severity should mean for your team. The defaults are 48h, 7d, 30d, 90d, and 1y. If those sound reasonable, you may not need to change anything.
What this controls
Every active finding in your workspace carries two timestamps:
- A warning date, after which the finding shows the amber Warning badge on dashboards and the Kanban board.
- A due date, after which the finding shows the red Breached badge.
Both dates are computed from when Retrievy first saw the finding plus the window you set here, with the warning date pulled forward by the Warning Threshold percentage. A higher threshold gives you more lead time before a finding breaches.
The platform defaults are:
| Severity | Default window |
|---|---|
| Critical | 48 hours (2 days) |
| High | 168 hours (7 days) |
| Medium | 720 hours (30 days) |
| Low | 2,160 hours (90 days) |
| Informational | 8,760 hours (365 days) |
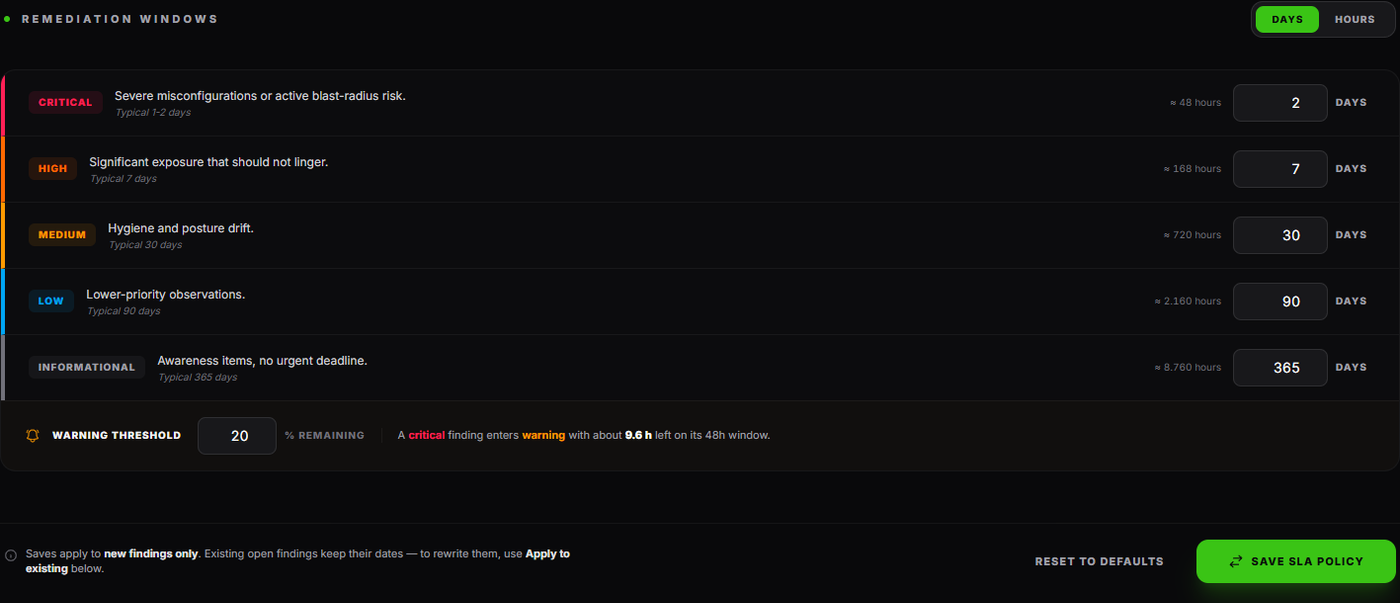
The default warning threshold is 20% remaining. With the 48h critical default, a critical finding enters warning state with about 9.6 hours left on its window.
Set the remediation windows
The Remediation Windows card lists all five severities in a single block.
- Above the rows, choose how you prefer to enter the windows: Days or Hours. The toggle is cosmetic. Whatever you type is converted both ways and the value is stored in hours. The grey hint next to each input shows the equivalent in the other unit.
- Type the new window in the row of the severity you want to change. Each row has a one-line description so you remember what that tier means (Critical: "Severe misconfigurations or active blast-radius risk"; Medium: "Hygiene and posture drift", and so on).
- Repeat for any other severities you want to adjust.
- Click Save SLA Policy at the bottom of the card.
A green SLA Policy Saved pill appears above the action row to confirm.
The maximum you can enter is 1,825 days in Days mode or 43,800 hours in Hours mode (five years). The minimum is one hour. Typing zero or a negative number is rejected with an inline error.
Saving the policy changes the rules going forward. Every finding that already exists in your workspace keeps its current due date and warning date. To rewrite the dates on existing findings, use Apply to existing findings below.
Warning Threshold
The strip at the bottom of the policy card reads Warning Threshold and accepts a percentage between 1 and 99. It is the fraction of the window remaining at which a finding switches from OK to Warning.
Type a percentage and the live preview to the right rewrites itself, for example:
A critical finding enters warning with about 9.6 h left on its 48h window.
Click Save SLA Policy to commit. The threshold applies to every severity at the same percentage, so a 20% threshold means high-severity findings warn at 33.6 hours remaining (20% of 7 days), medium findings warn at 6 days remaining, and so on.
Reset to defaults
The grey Reset to defaults link next to Save SLA Policy restores the platform-default windows (48h, 168h, 720h, 2160h, 8760h) and the 20% warning threshold, then saves them in one step. A browser confirmation pops up before the reset commits.
The reset is itself a save, so the warning above applies: existing findings keep their old dates until you use Apply to existing findings.
Apply the policy to existing findings
The amber card titled Apply to existing findings below the policy form is the only way to push a new policy onto findings that were created under the old one.
This action rewrites the due date and warning date on every active finding in your workspace. Tighter windows can flip currently-OK findings to Warning or Breached the moment the job runs. Looser windows can do the opposite. There is no undo.
Click Apply to existing. A confirmation modal opens with three sections:
- Policy that will be applied. The five windows you just saved, in your preferred unit.
- Findings to be rewritten. The total active-finding count plus a per-severity breakdown so you can see exactly how many findings each tier will touch.
- Current SLA state (before recompute). A snapshot of how many findings are Breached, Warning, and OK under the OLD policy. After the job runs the mix may shift.
If you are happy with the preview, click Apply to N findings at the bottom of the modal. The job runs in the background and the dashboards reflect the new dates once it finishes.
Resolved findings and risk-accepted findings are not touched. Only findings that are still being worked on are rewritten.
Cooldown between runs
To protect the platform, Retrievy limits this action to one run every fifteen minutes per workspace. While a run is on cooldown:
- The Apply to existing button shows a live countdown reading Available in N s and is greyed out.
- The confirmation modal shows the same countdown in an amber banner and disables the confirm button.
The progress bar pinned to the top edge of the card shows how much of the window has elapsed.
What the rest of Retrievy does with this policy
Every page that shows finding status uses the policy you set here:
- The Findings lists on every module dashboard (Command Center, CSPM, ISPM, SCM) show the Breached badge in red and Warning badge in amber based on the dates this policy produces.
- The Hardening Kanban board uses the same badges and can be filtered to Show breached only.
- The Reports module pulls breach counts and average time-to-breach into the Executive PDF and Technical PDF.
- The Audit Trail records every change to the policy and every bulk recompute, so you can reconstruct who tightened the windows and when.
How this affects your Retrievy Index
The SLA policy is independent of the Retrievy Index. Changing the windows does NOT change your score. Severity weights and module sensitivity are what move the score, and those are documented in the scoring rules catalog.
What the policy DOES change is which findings you see on the dashboards as "needs attention right now" versus "tracked but not urgent". Tighter critical windows make the Breached badge appear faster on the Command Center; looser low-severity windows let you defer hygiene findings without the dashboard chasing you.
Troubleshooting
Symptom: Save fails with "SLA hours for [severity] must be >= 1". → Fix: Re-enter the value. Zero, negative numbers, and non-numeric input are rejected. Whole hours and whole days are the only accepted formats.
Symptom: The Apply to existing button is greyed out and reads Available in N s. → Fix: Wait for the countdown to finish. Retrievy limits bulk recomputes to one every fifteen minutes per workspace. The cooldown is per-workspace, not per-user.
Symptom: I just changed the policy but my dashboard counts have not moved. → Fix: Saving the policy alone does not move dashboard counts because existing findings keep their snapshots. Use Apply to existing findings to rewrite the dates. New findings opened after the save will use the new policy from the moment they appear.
Symptom: I cannot see Settings → Organization → SLA Policy in the nav. → Fix: The page requires the Modify tenant name, timezone, and settings permission. Open Settings → Organization → Roles & Permissions and confirm your role has it under the Settings: Tenant group.
Related
- Roles and permissions for the permission that gates this page.
- Scoring rules catalog for the severity weights the Retrievy Index uses.
- Audit trail to inspect policy changes and bulk recomputes after they happen.
- Hardening Kanban to see how the Breached and Warning badges show up on the board.